
# Using the OpenVPN-GUI for Windows ---- **Important Note**: Please see the Official Readme here: https://github.com/OpenVPN/openvpn-gui#readme ---- **Notes:** - This page **requires** that you have already installed [OpenVPN on a Windows OS Computer](https://openvpn.net/community-downloads/) - For Windows XP/Vista see the old [wiki:OpenVPN-GUI] - Some of the screenshots here may not accurately match the current OpenVPN-GUI. ---- ## Locating the OpenVPN-GUI The OpenVPN-GUI Tray Icon:  If you cannot find the OpenVPN-GUI icon then check that Windows has not hidden it from you. (Because Windows likes to hide things from you ..) Windows hidden icons:  If you still cannot find the OpenVPN-GUI then make sure you opened it in the first place. You may use a desktop icon or the Windows menu to locate the OpenVPN-GUI. This is the OpenVPN-GUI desktop icon:  Additional notes: * You should now have access to the OpenVPN-GUI. ---- ## Preparing your installation to use the OpenVPN-GUI successfully If you encounter this problem: Message dialogue `No readable connection profiles found`  Press OK -- You **must** have a configuration file to continue. If you are creating your own VPN server and client then please go [http://openvpn.net/index.php/open-source/documentation/howto.html here] If you already have a client configuration file to a VPN then now is the time to import it. Additional notes: * You should now have a configuration file to import. ---- If you encounter this problem: Message dialogue `There already exists a config file named ...` 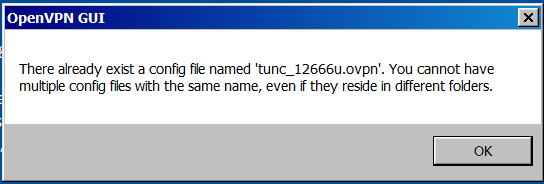 Press OK -- All config files **must** have unique names. Additional notes: * OpenVPN-GUI searches the entire directory tree (including sub-directories) of the following locations: * `\Program Files\OpenVPN\config` (`\Program Files` is the default installation directory) * `\Users\$USERNAME\OpenVPN\config` All `*.ovpn` files in these locations, including sub-directories, **must** have unique names. ---- ## Importing your first connection profile (config file) into the OpenVPN-GUI Select "Import->Import file ..." from the menu, then select the `config.ovpn` file you wish to import:  If the import is successful you will see: 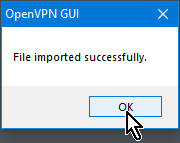 If your server administrator has provided a URL, username and password for importing from the server, use "Import->Import from URL..." or "Import->Import from Access Server..." and complete the dialog that opens up. Otherwise, check that you selected a correctly configured `*.ovpn` file. If you do not know what to do then please contact your server's administrator for help. Additional notes: * You should now have a successfully imported configuration file. ---- ## Setting up membership of the OpenVPN Administrators local group In order for your `limited user` account without administrator privileges to be able to use openvpn, your user account must be added to the `OpenVPN Administrators` group on your computer. This is normally done during the install phase but it may not have been done. If you see the message below you can select `Yes` but you will need the Local Administrator password to continue. If you do not have this password then please contact your network administrator for help. Message dialogue `Require membership in OpenVPN Administrators group` 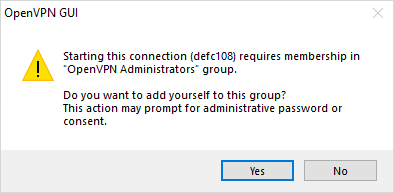 Additional notes: * You **must** now be a member of the `Openvpn Administrators` group. THIS STAGE MUST BE COMPLETED BY YOUR COMPUTER ADMINISTRATOR * If you are logged in to your desktop with an Administrator account then this stage will be omitted. ---- ## Navigating the OpenVPN-GUI menus The Main menu with only 1 configuration file imported:  With only one configuration file the menu displays all actions directly. The Main menu with 2 configuration files imported: 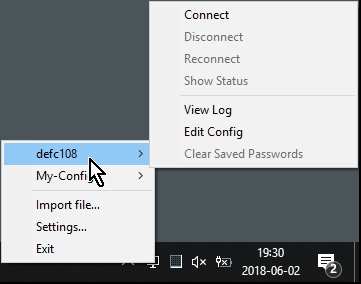 With two or more configuration files the menus will be nested. Additional notes: * You now understand the OpenVPN-GUI menus. ---- ## Viewing the log file The Main menu view log file: 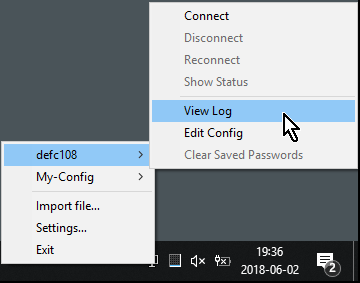 Additional notes: * A good application for viewing your log file is `BareTail`. * You now have access to your VPN log file. ---- ## Editing the configuration file The Main menu edit config file: 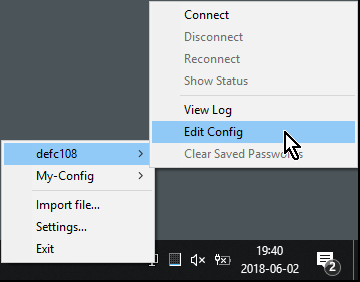 Additional notes: * A good application for editing configuration files is `Notepad++`. * You now have access to your configuration file. **WARNING** Do not edit your client configuration file unless you know what you are doing! [[br]] https://openvpn.net/index.php/open-source/documentation/howto.html ---- ## Entering Username and Password Username / Password dialogue:  If your server requires a username and password you will see this dialogue box. Additional notes: * Your client.ovpn file **must** contain the `--auth-user-pass` directive. * You can choose to save the password but the username is always saved. * These settings are saved in the Windows Registry under : `HKCU\Software\OpenVPN-GUI` * The "enter user/pass timeout" can not be configured The way it works is like this: if username/password is available, the dialog window is prefilled and displayed for 6 seconds. If during that time the user clicks on the window, the timeout is cancelled and the dialog stays on the screen until manually submitted. Otherwise it's auto-submitted after the 6 seconds timeout. The 6 seconds value is not configurable. If silent-connection is enabled and the username/password are saved then the dialog is not shown. **WARNING** Editing the Windows Registry is **strongly discouraged** .. Do so ONLY AT YOUR OWN RISK! ---- ## Trouble shooting Error connecting:  The first thing to do is [#gui-logfile examine your log file] for details of the errors encountered. Additional notes: * For help with trouble shooting connection problems please see [HOWTO: Request Help ! {2}](https://forums.openvpn.net/viewtopic.php?f=30&t=22603#p68963) Common connection problems: * `TLS Error: TLS key negotiation failed to occur within 60 seconds` This means that you cannot reach the server -- Please contact your server administrator for help. Please help improve this section. ---- ## OpenVPN-GUI Settings Most of the OpenVPN-GUI settings can be left as default but you should examine them to make sure this suites your requirements. ### The Settings menu, General tab  ### The Settings menu, Proxy tab  ### The Settings menu, Advanced tab  ### The Settings menu, About tab  ---- You are now ready to use OpenVPN-GUI for Windows. ---- ## Built-in help See: `openvpn-gui.exe --help` Note: The help text within `oenvpn-gui.exe` is out dated and awaiting update, the text here is a work in progress. `--connect` `--connect cnn` : Connect to `cnn` **at startup**. [[br]] (File extension is optional, default is .ovpn) Example: `openvpn-gui --connect office.ovpn` Example: `openvpn-gui --command connect office` (See `--command` below) `--command` `--command cmd [args]` : Send a command `cmd` to **a running instance** of the GUI. [[br]] (File extension is optional, default is .ovpn) Supported commands: | **Command** | **Description** | **Status** | |-|-|-| | `connect cnn` | connect the config named `cnn` | Supported | | `disconnect cnn` | disconnect the config named `cnn` | Supported | | `reconnect cnn` | reconnect the config named `cnn` | Supported | | `disconnect_all` | disconnect all connected configs | Supported | | `exit` | terminate the running GUI instance (may ask for confirmation) | Supported | | `status cnn` | show the status window of config `cnn` if connected | Supported | | `silent_connection [0|1]` | set the silent_connection flag on (1) or off (0) | Supported | Example: `openvpn-gui.exe --command disconnect office` Command line options that override persisted settings: (Note: Some of these options are obsolete and should not be used.) | **Option** | **Description** | **Status** | |-|-|-| | --exe_path path | Path to openvpn.exe. | Obsolete | | --config_dir path | Path to dir to search for config files in. | Supported | | --ext_string ext | Extension on config files. | Supported | | --log_dir path | Path to dir where log files will be saved. | Supported | | --priority_string str | Priority string. (See install.txt for more info) | Obsolete | | --log_append bool | 1=Append to log file. 0=Truncate logfile when connecting. | Supported | | --log_viewer path | Path to log viewer. | Supported | | --editor path | Path to config editor. | Supported | | --show_balloon bool | 0=Never, 1=At initial connect, 2=At every reconnect. | Supported | | --silent_connection bool | 1=Do not show the status dialog while connecting or non-critical warnings at startup. | Supported | | --show_script_window bool | 0=Hide Script execution window, 1=Show it. | Supported | | --connectscript_timeout s | Time to wait for connect script to finish. | Supported | | --disconnectscript_timeout s | Time to wait for disconnect script to finish. | Supported | | --preconnectscript_timeout s | Time to wait for preconnect script to finish. | Supported | | --iservice-admin bool | Use of interactive service as admin (0 = allow, 1 = not allow). Default is 1 for Windows 7+ | Supported | | --disable_popup_messages | Do not show echo messages received from server | Supported | | --popup_mute_interval hours | Time for which a previously shown echo message is not re-displayed | Supported | | --config_menu_view type | 0 = Auto, 1 = Flat, 2 = Nested | Supported | | --management-port-offset | Offset number added to config file index to determine the management port | Supported | The default log viewer and editor are set by file association. Any value specified on the command line is used only when no default is found. Example: `n/a` ---- ## Contributing You **can** help .. by simply taking part. search (your choice) : `site:openvpn.net "what ever you need"` ---- OpenVPN-GUI README.rst : `https://github.com/OpenVPN/openvpn-gui/blob/master/README.rst` [[br]] ---- ## Common connection problems When you [#gui-logfile examine your log file], if this is the **only** output which you find: ``` Thu Jul 26 23:51:48 2018 OpenVPN 2.4.6 x86_64-w64-mingw32 [SSL (OpenSSL) [LZO] [LZ4] [PKCS11] [AEAD] built on Apr 26 2018 Thu Jul 26 23:51:48 2018 Windows version 6.1 (Windows 7) 64bit Thu Jul 26 23:51:48 2018 library versions: OpenSSL 1.1.0h 27 Mar 2018, LZO 2.10 Enter Management Password: ``` Then the most likely cause is that OpenVPN has already started the connection profile. [[br]] You must ensure that all `openvpn.exe` processes are terminated and then try again.[[br]] The most common cause of this problem is when you use the incorrect OpenVPN Windows services: * **Stop** and **do not use** both the `OpenVPNService` and the `OpenVPN Legacy Service` Windows services. [[br]] * **Start** and **do use** the `OpenVPN Interactive Service` Windows service. ---- ## Known issues * Windows 10: If your TAP adapter fails to start but you are using a known good config that used to work with Windows 7: Try unplugging the ethernet cable and disabling wifi after you install Openvpn then reconnect the cable or reconnect to your wifi and try Openvpn again. ----